Replacing My Catalytic Converter - Part 1
This series of posts will cover what I did to replace the driver side catalytic converter on 2002 Pontiac Trans Am.

(Note: It’s a 4th gen f-body, so I believe it should be the same as any LS1 Firebird or Camaro from ‘98 - ‘02).
I recorded the whole job and put it up on YouTube; below is a playlist of all the videos.
I’m also recording all the details in a couple blog posts (starting with this one!).
How it all began
I had a “check engine” light come on, so I brought it in to a repair shop that I like, Figueroa Auto Care. They said it’d be $50 to diagnose the problem. They used an OBD-II scanner and got the error code P0420.
P0420 is the code for “Catalyst system efficiency below threshold bank 1” (Read more here). Bank 1 meaning the drivers-side of the engine.
The shop told me that my driver-side catalytic converter needed to be replaced, and that they would also clean the oxygen sensors in case they got clogged… They wanted $675 for the part and $175 for the labor–$950 total.
That price tag shocked me a bit… I knew that catalytic converters are just a bolt-on part, so I figured the labor isn’t too hard and they’re probably marking up the part. I didn’t think the shop was trying to rip me off, it just seemed like this was one of those jobs that you could do yourself and save some dough.
Replacement parts
I asked the shop about possibly installing a cheaper aftermarket converter, but they were insistent on using the OEM one.
I live in California, which has some of the strictest emissions standards and specifically requires a “CARB-Compliant” converter. The CARB-Compliant converters are a lot more expensive :(.
You also want to find a “direct fit” converter. The ones that don’t say direct fit require some welding.
Here are the part numbers and manufacturer pages for some options that I found. I’ve included the part numbers for both the driver and passenger sides for reference, but I only replaced the driver side.
- Magnaflow: ~$415
- Left side, part #448477
- Right side, part #448489
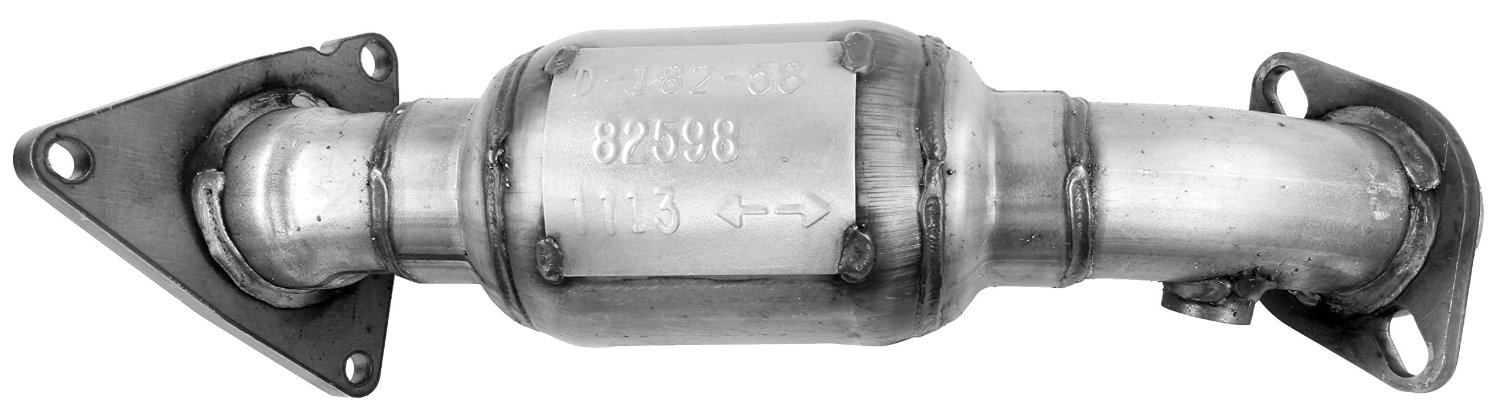
- Walker: ~$270 at CARiD
- Left side, part #8259
- Right side, part #82595
I ended up going with the Walker, and bought it on Amazon (of all places!) here for $294 plus tax and Prime shipping.
Replacing the cat means I also needed a new gasket to go between the converter and the exhaust manifold. Found one for $5 on Amazon here.

You also want to get a new set of studs and nuts (a stud is just a bolt without a head). The ones on there will be badly rusted and corroded (apparently this is caused by the high temperature of the converter), so it makes sense to replace them while you’re at it.
People say that the converter should come with the new studs and nuts, but the Walker converter does not. I’ll come back to the topic of replacing the studs farther down, because there’s a lot to say about it.
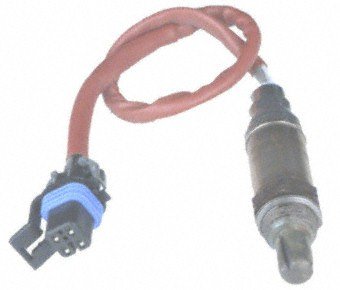
Part of this job is making sure the O2 sensors are working properly. This forum thread discusses cleaning the O2 sensors. The opinions feel all over the map. Something that’s consistently stated, though, is that cleaning O2 sensors effectively is difficult, because the part that really needs to be clean (the sensor itself) is inaccessible.
I figured out that the sensors just cost $31 each on Amazon. So I decided to replace them instead of taking any chances. This Bosch sensor fits my ‘02 Trans Am perfectly. Each catalytic converter has two of them–one ahead of the converter and one behind. The sensors are all identical.
Tools and compounds
Here are all the tools and whatnot I needed for this job.
A breaker bar to give you the leverage to break the nuts loose. I got this 24” breaker bar on Amazon for $26 + tax. It also has a rotating head, which is essential for being able to position it well. I hear that using an impact wrench here is a bad idea–it’s a good way to break the studs! I don’t have an impact wrench anyway, though :).
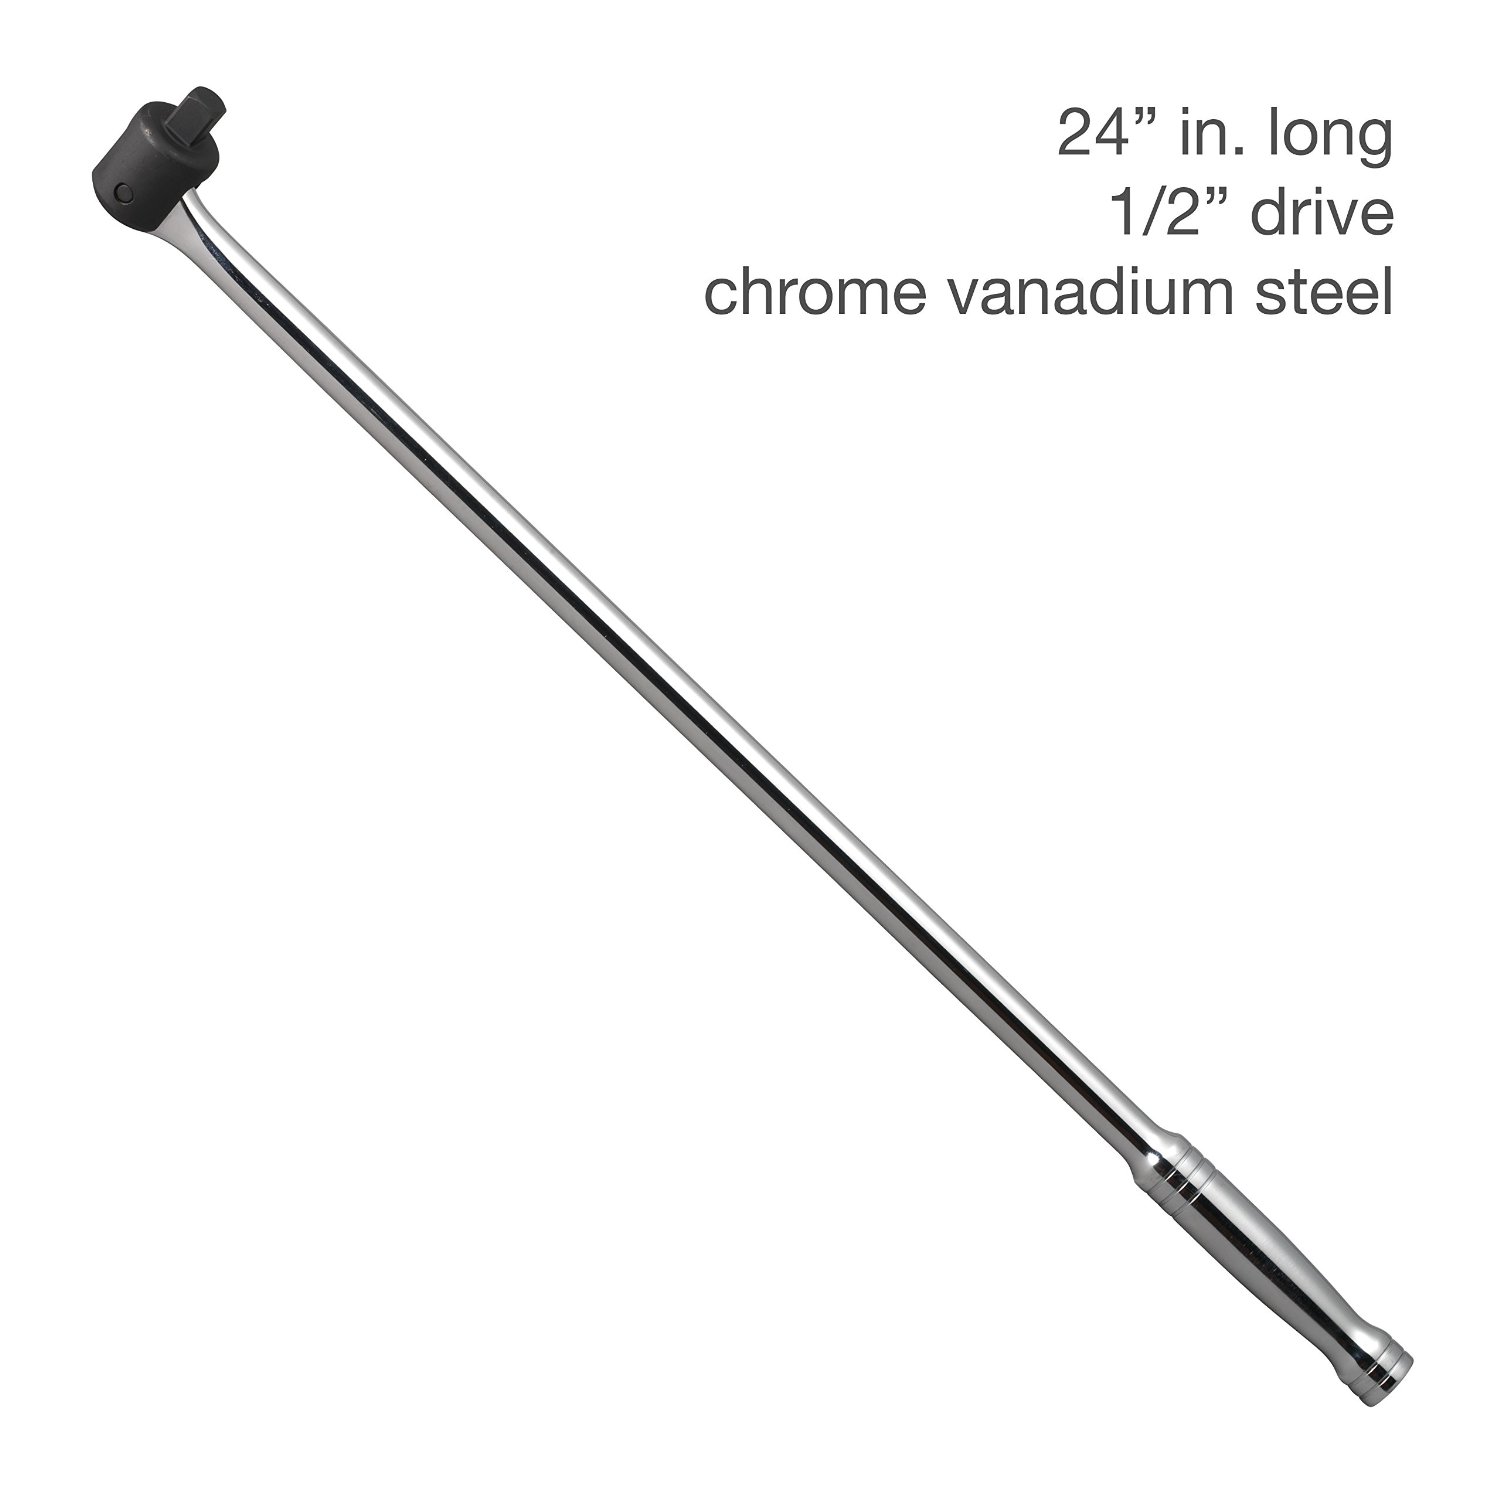
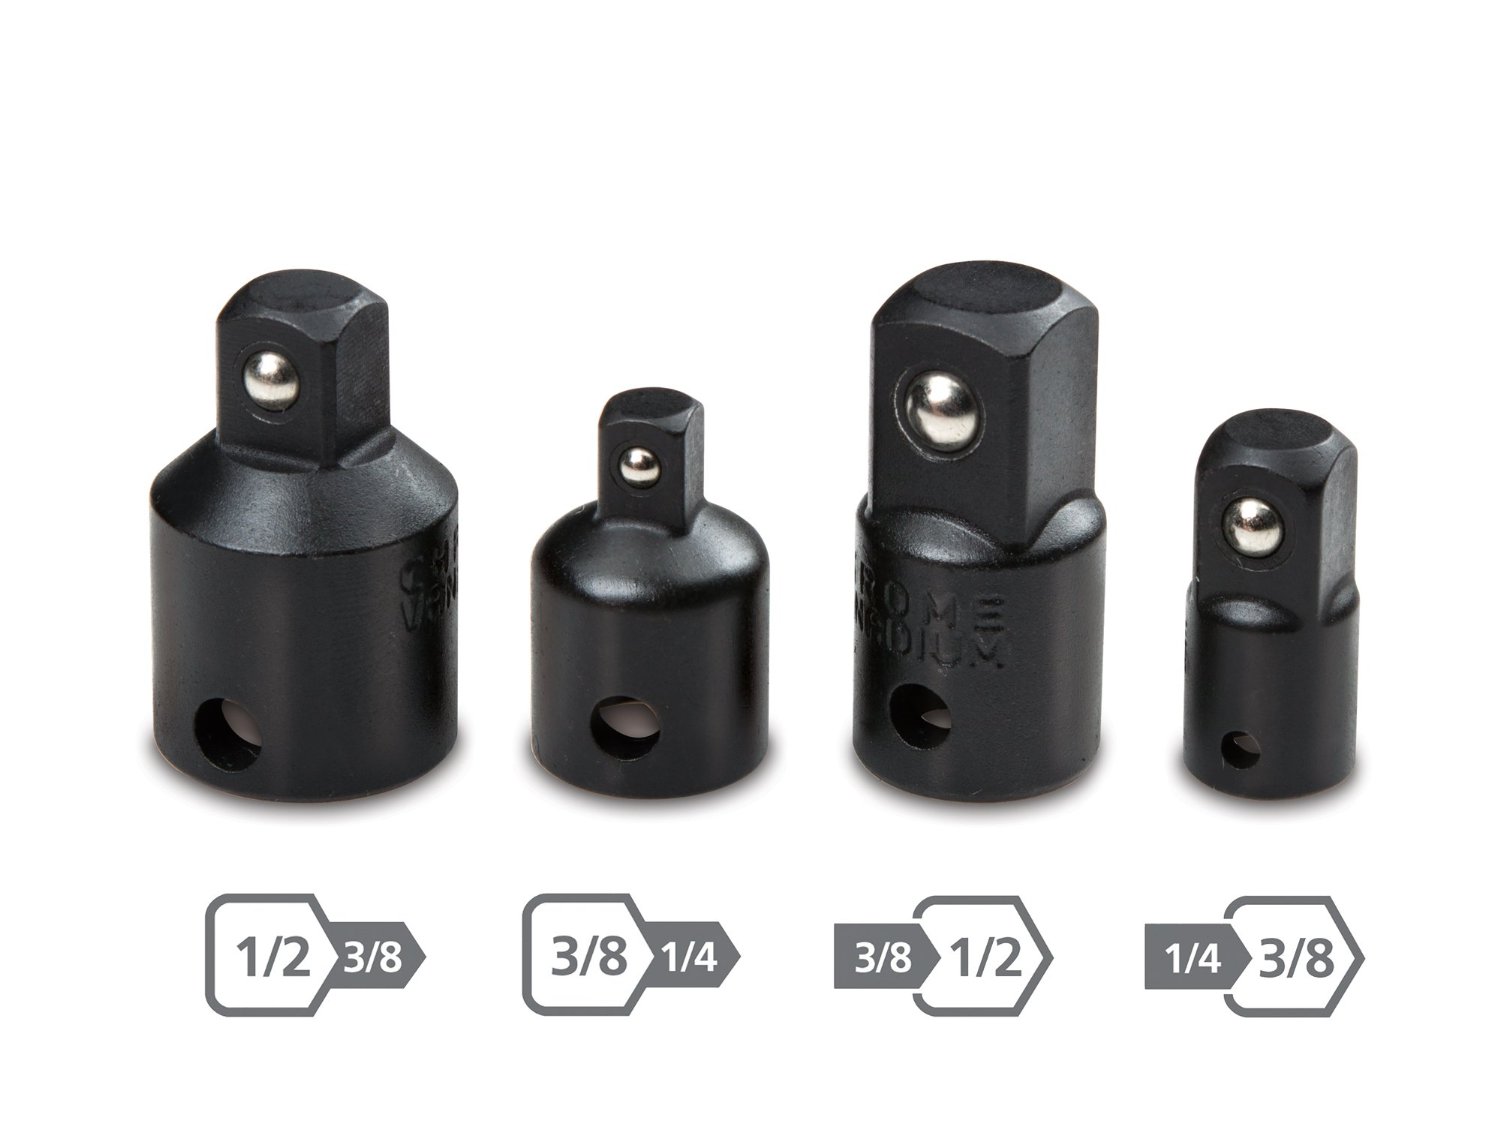
Note that the breaker bar has a 1/2” drive which is larger than your typical socket wrench set. A typical socket wrench will have a 3/8” drive, and a small socket wrench will have a 1/4” drive. I didn’t realize this at first, so I had to go out and get a 1/2” to 3/8” drive adapter from Sears. This adapter set on Amazon looks like a good bet–I ended up needing a 3/8” to 1/4” adapter as well to help me unscrew the studs (the studs have a small 7mm hex head on them).
Some penetrating oil to help loosen the nuts. I went with this stuff on Amazon.

You’ll want a good socket set. The three nuts on the exhaust manifold end are 15mm, and it’ll need to be a deep socket since the studs stick out some. The studs themselves have a 7mm hex head on one end that you’ll use to unscrew them. I also made use of the extender in my socket set, I believe it’s about 4” long.
Replacement studs and nuts
The studs and nuts are tricky to replace. They’re very specific to automotive, so you’re not going to find them at the hardware store.
- In theory you could simply use a bolt, but you don’t want to because the head could easily break off the next time you try removing it (after it’s all corroded).
- You can’t use a plain stud because you need a way to remove the stud (these studs have little hex ends to them that allow you to use a socket to screw them in or out)
On the stock converter the tailpipe end of the catalytic converter has threaded holes in it for the two studs. The holes in the Walker converter, however, are not threaded. Since there are no threaded holes, I believe this means that you could get away without the specialized stud with the hex end.