Add Borders in Lightroom to Fit Photo Mats
This tutorial will walk you through all the steps needed to properly crop, size, and add borders to your photo in order to create a print that will fit properly into the opening of a photo mat. This tutorial is specific to Lightroom–we’ll be using Lightroom’s Print module to accomplish a few key steps.
Whenever I decide to make a print of one our photos, with the intention of mounting it in a frame with a mat to border it, I run into the same puzzle of reconciling all the different aspect ratios, and the need for a small printing bleed.
For example, in the framed photo above I have the following conundrum:
- My original image is 5184px x 3456px (3:2 –> 1.5:1)
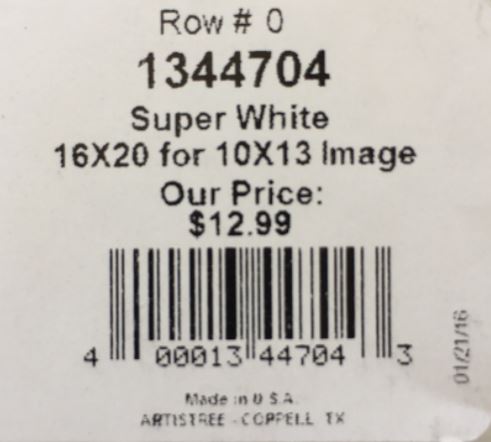
- The mat is labelled as having a 13” x 10” opening (13:10 –> 1.3:1)
- The opening is actually 12.5” x 9.5” if you measure it (1.32:1)
- I want my print to extend only just barely over the edges of the mat (e.g., 1/16” on all sides) so I really want my image to be 12.625” x 9.625” (1.31:1)
- The closest size print from Winkflash is 14” x 11” (14:11 –> 1.27:1)
I’ve waded through this problem a few times, and each time I pretty much had to learn how to do it all over again. I’ve yet to find a good tutorial that would walk me through what I need to do–so it’s time to rectify that!
Step 1: Select a frame, mat, and print size.
Before we can do anything, we need to know the size of the opening in the mat and the size of the print that’s going to come from the printer.
I’ve been ordering my prints from Winkflash–their prices are good (make sure to check for promo codes–there always seems to be some kind of crazy deal), I’m content with the print quality, and their selection of print sizes includes some wider aspect ratios (such as 11x14 and 12x18).
For this tutorial, I’m working with an 11x14 print size.
Once you have a print size, you need to find a mat that fits your frame and your print size. When you read the opening size on the mat, the actual opening is typically a 1/2” shorter on each dimension, to allow for a 1/4” overhang on all sides.
I buy my mats locally from an actual brick and mortar Aaron Brothers. On Amazon, it seems like you have to buy a 10-pack to get a good price.
Step 2: Crop the photo
If the opening in your mat doesn’t match the 3:2 ratio of your SLR, you’re going to have crop the photo to the right proportions.
To determine the correct aspect ratio for the crop, make sure to actually measure the opening in the mat. For instance, my example mat is labelled as having a 10” x 13” opening, but the opening is actually 9.5” x 12.5”.
Once you know the dimensions, use the crop tool in Lightroom, and type in the aspect ratio.
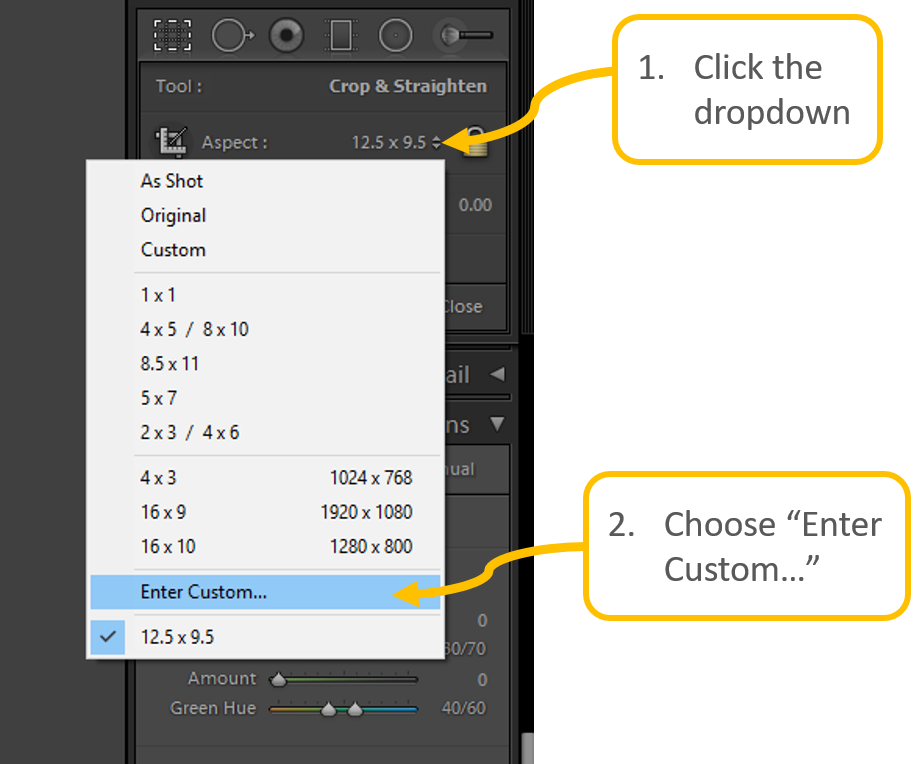
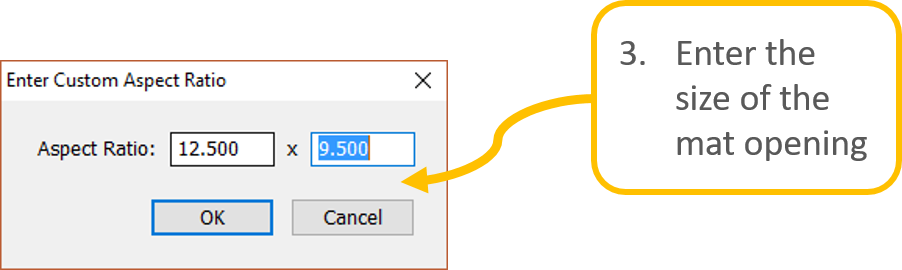
Side note: Despite the three decimal places in the dialog box, Lightroom only supports increments of 0.5 in the aspect ratio. You can specify 9.5 x 12.5 but not 9.75 x 12.75
Now you can crop the photo. You may want to keep in mind that we’re going to let the image hang over the edges of the mat by 1/16” on all sides, so you’re going to lose a few pixels around the border of the image.
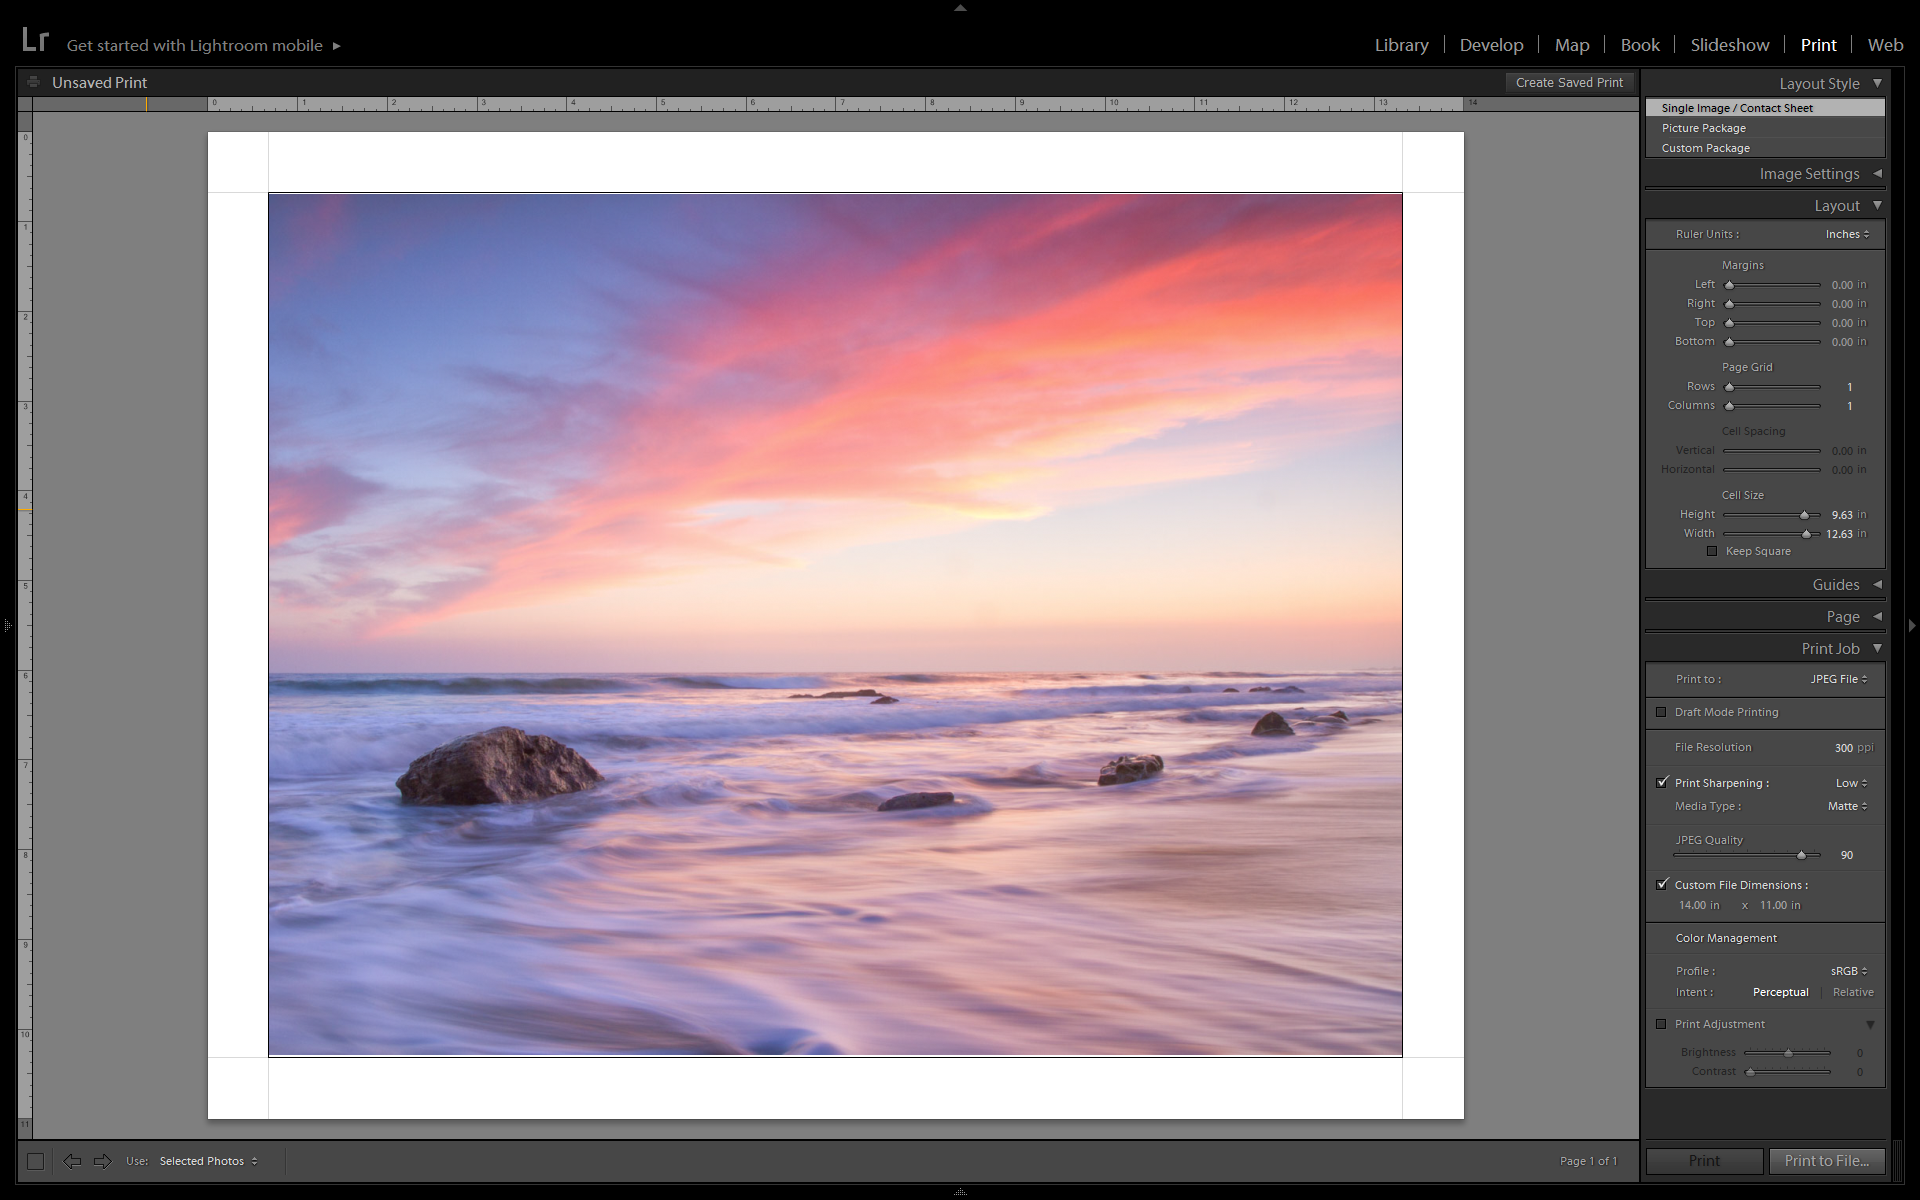
Step 3: Set file size in the Print Module
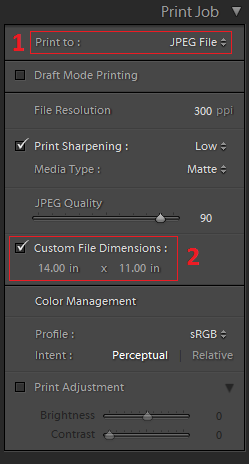
In Lightroom, go to the Print module, and go down to the “Print Job” section. Select “Print to: JPEG file”. Set the “Custom File Dimensions” to be equal to the size of the print offered by the website.
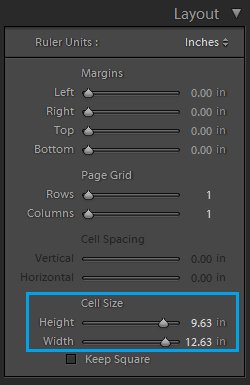
Step 4: Set the Cell Size
The cell size controls the size of the image within the print. That is, for however much smaller the cell size is than the file size, you’re going to get a white border around the image.
We are going to let the picture extend past the opening by 1/16” of an inch on all sides. So add 1/8” to both dimensions.
For instance, if the opening is 12.5” x 9.5”, we adjust this to 12 5/8” x 9 5/8” (12.625” x 9.625”)
Side Note: The aspect ratio of this cell size doesn’t exactly match the aspect ratio of the crop window, so the image will be maybe a pixel shorter in one of the dimensions. My recommendation is to not sweat this detail.
Step 5: Save the file
You can save the whole print configuration by clicking the “Create Saved Print” button in the right hand corner of the image area.
Then click the “Print to File…” button to specify a filename for the created print.
The resulting jpeg file will be exactly the resolution and the aspect ratio that the printer needs.
Optional Step: Use a non-white background
If you don’t mind some wasted ink on your conscience, you might want to set the print background color to black or grey, or just something other than white.
In the prints I’ve received with a white background, I’ve noticed that the images aren’t very well centered within the paper. My guess is that the prints are cut by hand, and leaving a white border around your image makes it hard for the printer to see where they should cut the paper.
This shouldn’t necessarily concern you, though, since the white border is completely hidden behind the mat. As long as the image itself is the right size on the paper, you’re fine.
The only advantage I could see to having the image properly centered is that it would allow you to align the print on the back of the mat using measurements. (That, and maybe making the printer’s job less stressful?). I haven’t had too much trouble just eyeballing it, though.
If you did want to solve this, I think the ideal solution would be to leave a thin black border around the outer perimeter of the file, but Lightroom only lets you put a border within the image itself (within the cell dimensions). So the easiest alternative is just to make the whole background grey.
Bonus - Taping to the mat
Taping the pictures to the back of the matte can be a little tricky. You’re looking at the back side of the mat while taping, but you need to see it from the front to know where to place the picture!
One trick that’s worked for me–find a mirror in your house with a table underneath, and lean the front of the mat against the mirror. This way, you can see the picture in the mirror and tell if you’ve got it lined up right!